I was lucky enough to have a quick getaway to Alcudia in Mallorca last weekend for a flying birthday-treat visit, with two fabulous friends. Perfect bliss!
And of course I couldn't leave without packing a couple of new makes to wear. 26 degrees, turquoise seas and pearly white Balearic beaches gave me the perfect opportunity to indulge in sewing up a couple of cool summer garments, even before the temperature gauge has reached double figures in the UK. Summer wardrobe staples, hot off the machine, and I am ahead of the game.
For the last couple of weeks though I've been pretty focused on getting my work finished before taking a couple of days away, so I needed patterns that were tried and tested, that I could whip up with minimum fuss and in double quick time over a couple of evenings. For example, I already know that the blue Bardot style top from Cynthia Rowley doesn't require any fitting as it's a very loose style, and having solved the wayward neckline issue a couple of weeks ago (see that post here for how, which I am still very chuffed about) I felt another one of these would fit the bill for a cool and floaty top. This crisp cotton was already in my fabric stash and its coastal blue and white anchor print was just calling out for a beach themed garment.

Yes I know it's a bit 'coals to Newcastle' taking a nautical print to a seaside port, but I think it's really fresh and fun looking. And I love the way I can have the sleeves on this either longer or shove them upwards for a poofy, shorter look. Is there a technical word for that sort of sleeve?
Now, the blue top that I already made from this pattern is purposely swingy and has a lot of volume going on. It's great with skimpy shorts or some sort of tapered bottom half, but I had the idea of creating some means of reining a little of that excess in for this new version. I thought about creating another channel for elastic at the waist, or at the hemline for a cocoon shape, but after a bit of experimentation I came up with this.
The two very small loops inserted at each side seam at the waist, accommodate a length of cotton tape, which when pulled in at the back, creates gathers that fold inwards. From the front it looks a little slenderer and creates a bit of interest at the back. Ideally I would have used white or navy grosgrain ribbon for this waist tie, or even introduced a colour (yellow?) but I used this white tape from my stash as there was no time to shop for bespoke notions pre-flight!
The next garment to hit the machine was a pair of shorts to compliment the top. This blue cotton, on the right of the anchor print, is very like lightweight denim, with an interesting finish on one side that appears exactly like the reflections of light on water. The back of the fabric is solid blue.
It was a scrap I salvaged, along with some other miscellaneous pieces, from a pile of cloth remnants left in a box outside a house on my street. The box had a notice on the front offering the material to anyone who wanted it, with a request that any donations posted through the letterbox in return, would be directed to the local cats home! I love fabric bargains, and I quite like cats, so double happiness right there.
There was just enough of this fabric for a pair of shorts and the pattern is taken from one that I have re-used many times before and has become a bit of a wardrobe staple for me. Simplicity 1430. None of these designs are going to set the world of sewing on fire, but actually I have made quite a few of each of the tops, trousers and shorts and they have been reliable bread-and-butter basics.
These shorts are a really flattering cut, with front pockets, a neat fly, a wide waistband and double button closure. I've tweaked the pattern in the past so I know it is tried and true. I also know that I can make these out of fabric fumes if I am running on only remnants, using contrasting fabric for the inside waistband and pocket yokes if necessary. In this case, there was just enough blue cloth to complete the whole thing.
The great bonus about both of these makes, apart from the fact they go perfectly together and with lots of other things, is that they are so soft they pack away to nothing.
Obviously this means lots of room to pack a TON of other clothes into my carry-on case that I just didn't need and didn't wear at all! Never mind. Part of the fun of holiday packing for me is second guessing every possible eventuality that might occur and making sure I have it covered. Minimalist I am not. I can vacuum pack 27 outfits into Ryanair size-conforming hand luggage with a selection of shoes to match, and still have room for souvenirs on the way back.
Also included in the flight bag for evenings that I must mention, was this top, made last year and again from charity shop remnants.
I made this from a scrap of beautiful silk-satin moire found in a trunk of old linens, along with some black lace and black grosgrain ribbon. I love this Burda bustier top pattern, even though it is very cropped (and my abs have unfortunately taken early retirement). I haven't worn it very much here in the UK for that reason (I can perform a reasonably impressive 'plank' if forced to, which would suggest I do have some core muscles somewhere within, but lord knows where). I added a little more coverage at the waist using black lace along the bottom hem and paired it here with a high waisted black skirt with a wide waistband, found at New Look. This gives the whole look the desired cropped-top effect combined with a comfortable amount of coverage.
I couldn't resist making up some tassel earrings in black leather to go with this too. Ready for cocktail o'clock and a couple of Moscow Mules, beach-side.
And so a fabulous three days in Alcudia, Mallorca was had by all and my Vitamin D levels have had a much needed boost. I'll be hanging on to these memories as long as I can.
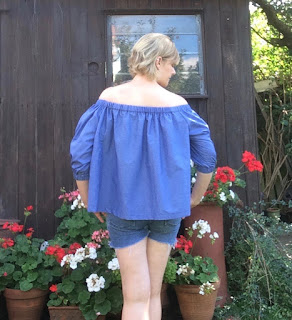
Welcome back to the wardrobe, blue Bardot style beauty! Saved from the scrap heap, I'm back in love with this off the shoulder top again after a rather stormy start.
This was created in late August 2016 as a last minute summer make to wear on those balmy early autumn days. Due to a technical issue with fit, i.e. not being able to do so much as lift a glass of prosecco halfway to my lips without the top pinging upwards in an alarming fashion, I gave it the cold shoulder treatment and never wore it. This morning I decided to look at it again, and voila! I'm smitten. Problem solved. For that reason I thought I'd let you know how I sorted out the fit, as it's something I think many of these types of garments have as an issue, and it might be useful to share.
So let's go back a beat. The pattern is a Cynthia Rowley one and I won't bore you with the detail of the original make again. If you look here you can see the process in my first blog post about this make (and you can read the grumbling too).
At the end of last year I saw so many cold shoulder, Bardot style tops around and decided to make this one. Made it. Loved it. Wore it. Hated it. Basically, the top itself looked great on, the fabric was lovely and the colour right up my street. But I just couldn't get it to stay on - or rather off - my shoulders. Every time I moved my arm higher than waist level, the elastic would pull in and whoosh! Up it popped in a desperate attempt to contract to its unstretched state, only to slap me in the ear and come to rest at a rather odd angle. The issue of course was that, in order to magically stay in place at that golden spot on the top of my arm, the elastic must remain tight enough to stay up above the bust (major wardrobe mishap waiting to happen if it was too slack here, as I don't have that much up front to hold anything aloft for long), but relaxed enough not to want to zoom upwards. For this reason, it was never worn and I ended up flinging it back on my fabric pile to be reused again as scrap.
Lately I've been eyeing up some other similar tops on the high street and thinking, hmmm I do still really like those, maybe I could just buy one? And after flirting with a couple of them last week in the changing rooms, I had to stop and give myself a good talking to. What on earth am I doing purchasing the EXACT SAME style top, with the EXACT SAME issues? I am a maker. So what I should be doing is going back to the original and using my knowledge of making to sort it out. And so I did. This is what it took.
This highly complex and sophisticated structure, also known as five inches of elastic, is my solution. Yes it really did take that much investment, along with 25 minutes of sewing time, to totally solve the problem. Genius. This little piece of elastic, covered in a tube of the same fabric, goes inside the top, attached to front and back of the sleeve, and sits just around the very top of my upper arm.
Here it is in situ. I have attached it in place inside the top, along the front and back seam lines, stitching in the ditch so that the fixing is invisible from the outside. It is snug against my underarm, but not tight, and there is plenty of room for moving around without it being restrictive in any way.
So I have essentially created a loop, and I put my arm through this, and then into the sleeve itself. This comfortably keeps the top neckline elastic in place and makes it impossible for it to creep upwards.
And it's back in the game! In fact I can, after rigorous testing confidently report that even 180 degree arm swinging is now perfectly possible and the top will return to exactly where it is supposed to be. Top shelf cereal packets? No problem! Tying laces? No problem! Adjusting sunglasses? Just watch me! No wriggling around, no hoiking it back down, no more mini robot-arm movements with my elbows glued to my sides. I'll be celebrating by drinking a glass of something chilled in the garden this Friday evening and demonstrating, with expansive arm movements, how my superior engineering skills saved Bardot from the bin.
It makes me wonder why I didn't just spend a bit of time thinking about this in the first place, before getting into a huff with it and throwing it in a heap. Well I guess that's a lesson learned really, to spend a a little bit less time huffing and puffing and a little bit more time applying myself to finding a solution. Lessons for life and sewing.
I love a trench coat. Practical, stylish and they never EVER go out of fashion. So although trends come and go you can always rely on a classic trench to have staying power. I have already made one of these coats here, the very loud and lovely cream one covered in yellow, grey and pink roses (subtle, moi?), which I've worn and worn well into the autumn last year. I've been eyeing up this same McCalls pattern (McCalls 5525 now out of print) ever since, with the idea of making another identical version in a dark blue cotton for the Spring. And here it is.

Made from a lovely cotton twill-type fabric in deep navy blue, from a wide, 3 metre piece I purchased from John Lewis, Birmingham back in November last year. I actually bought it from the furnishing fabric section as it was exactly the colour, weight and quality I really wanted and I just could not find elsewhere. I also had a gift voucher burning a hole in my purse and as the fabric was quite expensive (well, not huge amounts but definitely more than I usually shell out, being more likely to get fabric in the sales), it brought the cost down a bit. It has really good structure and body, but is still nice and soft to the touch and was lovely to work with.

All my coats have to be hard working garments and ready for all sorts of action. It is rare that I'm not toting around large bags, pockets full of bits the kids have collected, armfuls of coats, hats and gloves as the kids shed them, and usually with a dog in tow. They get chucked in the back of the car without much care. Out we march in smart boots for lunch and shopping, then afterwards smart boots get swapped for wellies and off we go again for a beach walk and a paddle. If you can't multi task, then you don't get a place in my wardrobe!

I wanted a navy coat as I often wear blues, clarets and plum colours and wanted a change from black when a dark coloured outer layer is needed. I also have a navy blue leather jacket which, despite being at least 20 years old, still gets wheeled out as it goes with absolutely everything. But it's not warm, or practical really. It is also, dare I say it, a tiny bit scruffy due to its decrepit old age! To give this new coat a unique twist I decided to put a bright cerise lining inside, which is only visible occasionally through the back vent. This was taken when I was attaching the lining to the front facings, but you get the idea of the hidden colour underneath. Punchy! It's a reasonably good weight too, so provides another layer of warmth, as I'm a bit of a delicate flower when it comes to spring weather and need a wind proof layer to brave the elements until at least June.

I wanted some embroidery, to bring the coat up to date and also because I love an embellishment somewhere about. It is very rare for me to make something 'plain' without adding a personal twist, and in this case it is a nod to the wonderful MacQueen embroidery used in his Fall 2016 collection, featuring flowers and insects. The high street has really jumped on this trend and you can see embroidered jackets, jeans, blouses and even boots everywhere just now. In my case I have two moths and a rather bold stag beetle to the collar, back and sleeve. I might be tempted to add more yet. You can see the cerise coloured topstitching here too, which was a bit of a challenge on my new machine! I'm quite pleased with it overall and the colour is great against the navy.

The embroidered insects are actually done on separate pieces of material, using embroidering cottons and a ring to the keep the area stable. Then I used a little bit of fabric glue (something like fray check) around the outside, cut as close to the stitches as I dare and hand stitched the piece to the coat itself. This way I can then remove them, replace them or add and take away as I wish, without having to unpick the whole design from the coat. There are some very nice ready-sewn patches in the shops and online too, which would be much less time consuming and easy to apply if you fancied jazzing something up in double-quick time!
The dress form pictures didn't come out well as my poor old phone was battling to accommodate a dark navy thing against a white background, without exploding with the effort to focus. Here's one of the back, where you can see the really nice shape as well as a moth and more top stitching around the back flap, collar and belt.

And the front. Why have I taken this at such an odd angle? I was clearly multi tasking while photographing, this and failed at this job. Either that or the dress form has had a sneaky wine or three. Anyway you can see the double breasted, button front. Also I was experimenting with embroidering the cuff bands too at this point, and then decided against it. The coat design has cuff bands, shoulder tabs and a collar tab to close the coat right up at the neck. Practical and functional and also provides some nice elements to sew. The buttons are very plain, matt navy ones. Personally I like coat buttons to disappear, as an overly characterful button can be too overpowering for my liking. Never thought I'd call an embellishment 'too overpowering' as usually I'm all for a design twist or decoration, but I usually drawn the line at shouty buttons.

It's a really great pattern and I can thoroughly recommend looking out for a second hand (eBay?) copy. This coat's first outing on the beach was a complete success and it has since come back home to the City for some equally successful urban trips. So bring on the Spring!
Well who can resist sneaking out in another summer garment? As the mercury nudges 26 degrees this week suddenly Autumn mist and chill mornings seem very distant still. Just as I'm gearing up for some light layers, coats and cover-ups (a new mac, long line 'coatigan' pattern and some lightweight wool tweed are all currently out of the cupboard and onto the project pile) we're all back to shorts, floaty tops and summer dresses, hurray!
I made this back in late August actually, but have just around to writing about it. This is because I photographed it and then promptly took some of it apart again and re-jigged it. More on that shortly.
This is a Cynthia Rowley pattern, a very simple design and easy to sew up. I liked the deliberately expansive shape of the top and sleeves, combined with lots of bare shoulder for interest. The shape is really lovely I think, especially when combined with little shorts, skinny jeans or something equally slim fitting on the bottom half. The fabric I chose is a cotton poplin in blue, a little like a lightweight chambray, and has just enough structure to hold the shape nicely whilst still being soft.
Now, confession time. I DO think this top looks good on. I DO NOT like wearing it. Such a shame! It is basically the most impractical top ever. In order to move around in it, you have to remain rigidly upright with arms by your sides, as it restricts the use of ones arms to such an extent that even raising them to waist hight causes the elastic to rise up and off the shoulders. Absolutely any raising of the arms at all means the neckline pings upwards. I had thought that this garment could be reserved for activities that require the bare minimum of animation, like sitting in a bar drinking wine. But no! Even putting an elbow on the table, or raising a glass to my lips, has the immediate effect of releasing the elastic from its stretched position around my upper arm, to its preferred position somewhere around my neck. So very irritating. This is basically my upward-arm-swing limit.

That's why it ended up being taken apart and re-sewn, as I thought it might require the elastic loosening a little to make it sit in place. I unpicked the casing around the neckline and added some extra few inches o the length to the elastic, basting it back together and adjusting a few times to see if it improved things. It didn't. That neckline remains coiled and ready to spring at any moment. Unless I basically made it so loose that it would risk going the other way, i.e. downwards (and thus an even more major wardrobe malfunction), there really is no hope for it.

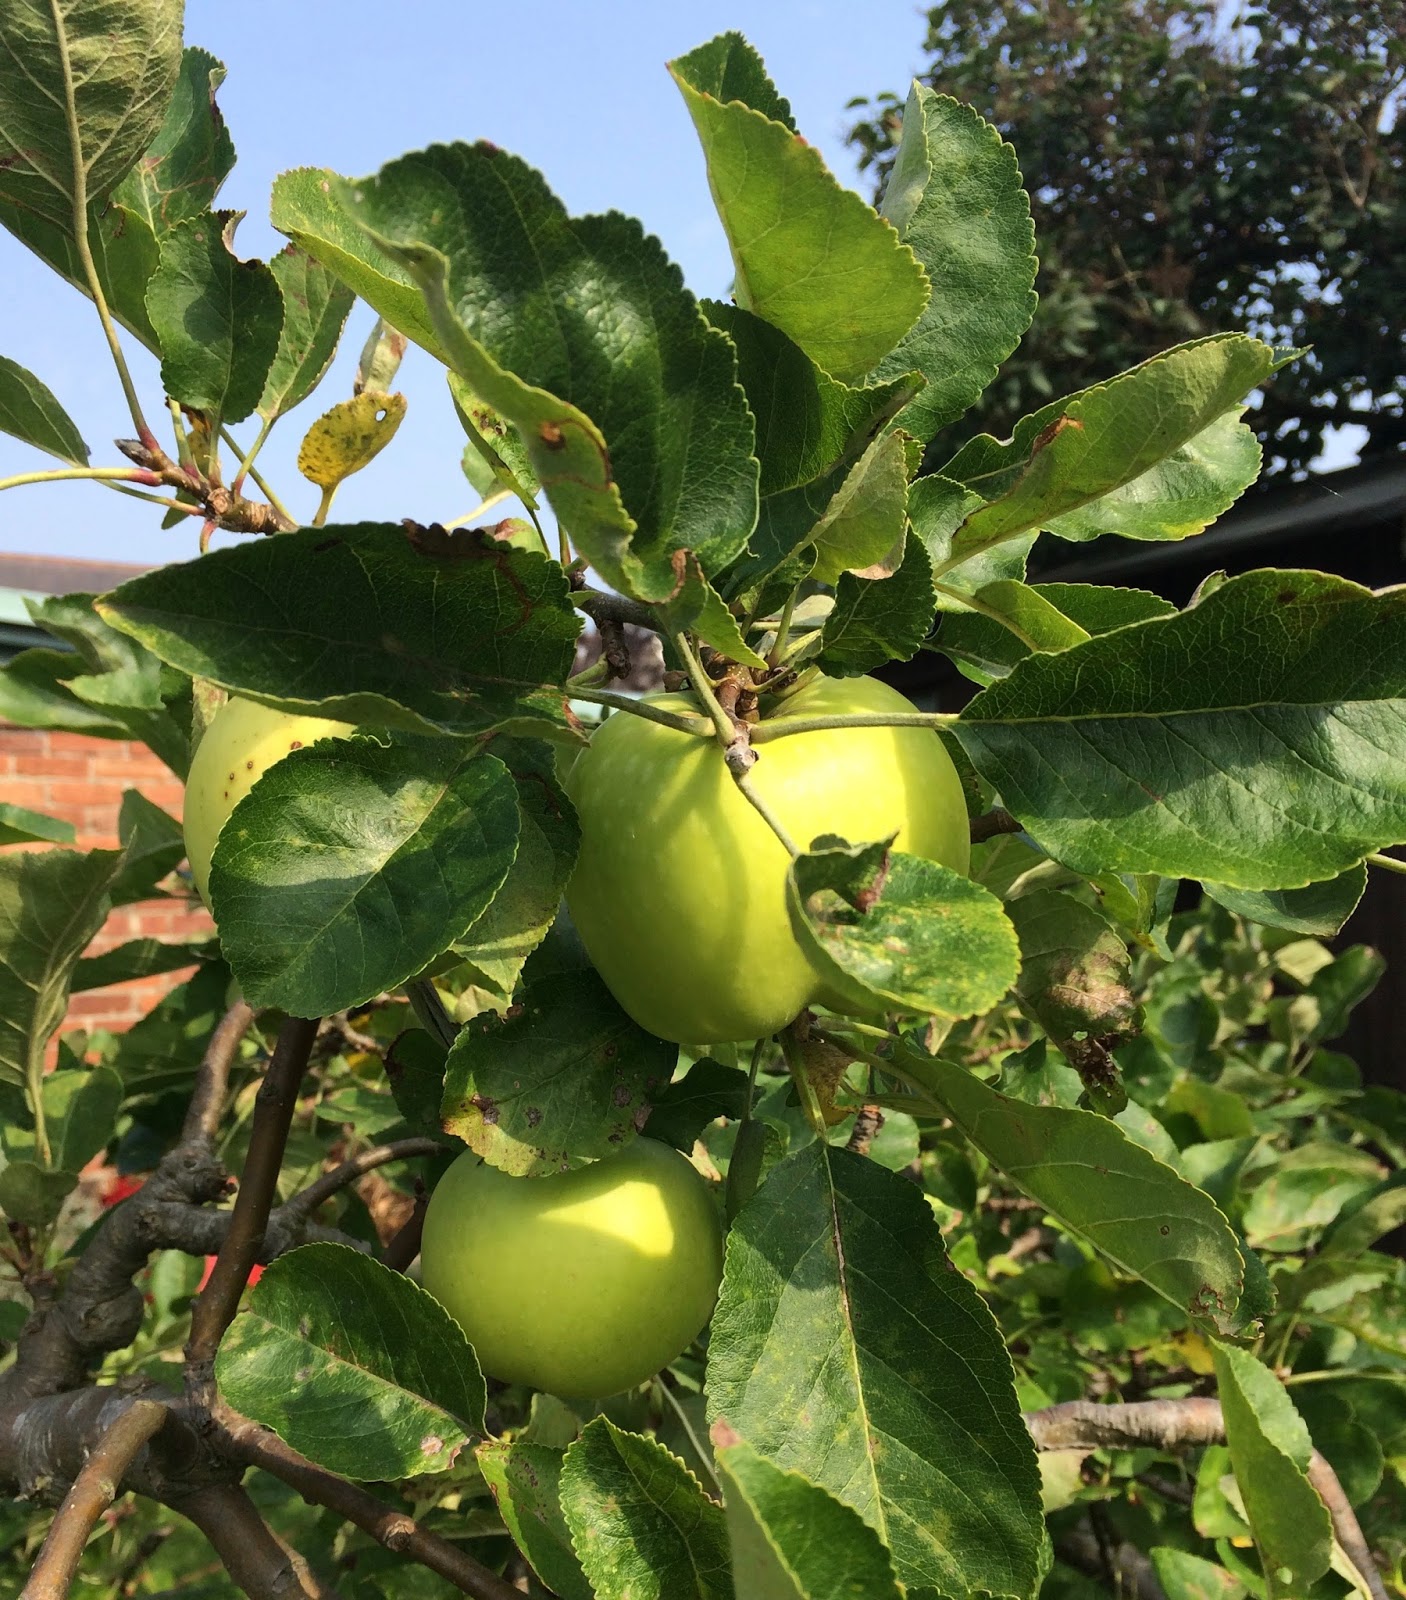
I'm keeping it in my wardrobe for now, incase I think of anything else I can do to resolve the issue. I might make the elastic super-loose and add two small shoulder straps. Would that work? Maybe. As we can surely be only days away now from the cold snap of Autumn to arrive, then this top's days are numbered in any event. In the meantime, I love this time of year and am enjoying these few extra days of warmth. The garden is blooming, the tomato crops are bountiful and the apples are especially delicious when freshly gathered, still warm and scented from the sunshine. Now if I could just reach up far enough to pick one ...
Here's my last summer dress make of the season - probably (not promising!) and also my favourite this year. In breezy, beach blues and whites, I made it just in time for a gloriously sunny holiday by the sea in Filey, England. That is to say I took the unfinished dress with me on holiday and actually finished hand sewing the hem one evening while I was away. I'm always up against the wire when it comes to deadlines.

This is made from a quite substantial blue and white striped cotton that I originally bought back in the spring with pyjamas in mind. But pyjamas can wait, as long as the sun shines I'm sewing dresses! The design of this one is off-the-shoulder with a fitted bodice and the skirt has four deep pleats from the waist. The pattern I used is Simplicity 1418, which offers a number of bodice styles, including various sleeves and shoulder straps and a version with a low cut back panel, or lace up back. It's actually a great basic dress pattern and you could take it in lots of different directions. I decided to make this up with a plain, higher back panel on the bodice, as the back needed to stay up with the dropped sleeves and I also needed strapless bra coverage.

The hefty pleats at the front and back give the skirt a fair amount of volume, which works well in this full bodied fabric at midi length. I actually added around 6 inches to the recommended skirt length to make this a midi dress rather than finishing on the knee. I don't have many dresses this length but the proportions felt right for this shape and it's easy and flattering to wear.
I have to say that this fit and flare, full skirted style is probably not my usual go-to shape for a dress though. It's a little too fifties in the shape and cut for my usual taste. Although vintage and particularly fifties era is a very popular silhouette just now, it isn't usually the look I go for personally. However the clean blue and white stripe along with the off-the-shoulder sleeves brings a more fresh and contemporary look, and it's just as happy to be on the beach as a day dress as revved up with heels and a biker jacket in the evening.
The shoulders feel surprisingly secure, despite their unusual floating appearance, this thanks to an elasticated casing travelling underneath each one to hug the upper arm. I like the wide scoop of the neckline this gives, both at the front and back. The zip is concealed at the side seam, so the back neckline has the same clean and uncluttered finish.
I was curious to see how it felt to wear under a jacket, given the dropped sleeves, but it was fine and not annoying at all, as some elasticated drop sleeves can be. I wore this on the beach all day, occasionally throwing on my battered old navy leather jacket when the clouds rolled in, and it held its shape beautifully.
So a bit about the construction process. I cut a UK size 12, going straight into my striped fabric without preparing a toile. I can tell by measurements pretty much whether a dress is going to fit ok, and as long as there are seams and darts to adjust, there is the opportunity for me to tweak along the way. I did end up letting out the bodice side seams about half an inch under the arms. I always forget how much my ribcage flares at this point and, although the rest of the dress fitted fine, I did need the extra ease for breathing room here.

The dropped sleeves really need to fit well and it's worth spending some time on this because otherwise they end up being too large and droopy, causing them to crease and drop, or they will restrict your arms if too tight. I would recommend basting these on with the elasticated casings in place underneath, and then adjusting to fit before finally sewing them in place. They should feel secure and hold your upper arm, keeping their shape without flopping down or creasing up, but with the actual sleeve itself appearing to just follow the neckline in a smooth upward curve. This meant a fair bit of finagling around and trying on, but the rest of the dress is very simple and easy to sew up so you can afford to apply some concentration on this stage in the process. These casings shouldn't show at all, but they're very clever at keeping things in place.

I decided to fully line this garment, the instructions for which aren't included in the pattern (the pattern includes front and back facings only). I used a very lightweight cotton to keep the dress cool and airy - it's cream rather than white, because that is what I had to hand, but actually it doesn't matter as the outer fabric is quite thick. To line this dress you can basically cut out the bodice and skirt sections again and make up in the same way, attaching as you would the facing instructions. I hand stitched the lining around the zip on the side seam.
So I'm back home from holiday now and sadly that is my last summer sojourn this year. We were so lucky to have two fabulous holidays this year in both Spain and the UK and I'm already missing barbecues on the beach, seafood by the bucket load and drinks by the sea as the sun goes down (and making friends with heavy machinery - isn't this the cutest tractor though?! Just me on the that one?).
Anyway I'm hoping for an indian summer here in England, so that I can keep wearing this through September. It is most definitely a garment to make the most of tanned shoulders and strappy sandals, so I'll be making sure both the dress and my shoulders gets as much air time as possible before the autumn.
Hola! Just back from Spain and thought I'd do a quick update on my holiday sewing. I wanted a couple of quick and easy holiday items and wow, what a joy it has been, after such a dismal start to the holiday season here in the UK, to sew up some real summer clothes!
My trip to La Cala de Mijas in Spain provided all the opportunity I needed to catch up on wearing my much missed summer clobber. With temperatures up to 36 degrees on some days, having light cotton clothing was essential. La Cala is a really pretty little seaside town in Malaga on the Costa del Sol and provided the perfect get away for some sun, swimming and sangria based activities. There is an open square down near the seafront, surrounded by cafes and bars, including a wonderful artisan ice cream place. A perfect spot to hang out in the heat of day and watch the world go by.

So in anticipation of needing light clothes that pack small (Ryanair flight and we had one suitcase between 4 of us!) I made several more Burdastyle tops similar to this, including a jungle print version (yes another palm print variation!) in a very fine voile. I didn't take any pics in Spain of the top, but here it is being tested out the week before on one particularly scorching afternoon at a picnic. I've already blogged the variations on this and can whizz them off the machine fairly quickly now.

First out of the holiday suitcase though were my newly made shorts, completed the day before we left and which I have to say got worn probably 5 days out of the whole week. I made them out of very lightweight cotton poplin in a khaki or olive green shade, then customised them a little with black grosgrain ribbon at the pockets and orange embroidered details. Not many decent photographs of me wearing them in Spain due to only taking family holiday snapshots instead of posing properly. But here they are working hard on the beach.
I really, really love them and, considering they were made from scraps and an existing well used trouser pattern, they were the best value item in my suitcase by far! Just the right combination of comfort, practicality and a little bit of sass. And they go with everything. Capsule wardrobe gold, right there.
The pattern I used is actually a modified version of the cropped trousers I made back in March here and again in May here. They are from Simplicity 1430, which includes trousers, jacket, top and the shorts. The grosgrain ribbon added to the edge of the pockets add a little military precision to them, finished at the bottom seam with a flash of orange stitching. Excuse the colour being off here in this photo below, but you can see where I've stitched across where the pocket opening meets the side seam. It does a practical job of holding the grosgrain in place and stopping the seam straining when I shove my hands in my pockets.

Once I'd sewn that little bit of orange, I began to consider another embellishment somewhere, and settled on personalising my shorts, quite literally putting my name on them. I love the monogram trend and the way you can have your high street purchases emblazoned with your name nowadays - bomber jackets are popular for this. I'm putting my new fad down to holiday spirit.
I wore them with black and the jungle print top mostly during the holiday, so just kept changing the coordinating top around. Here I've taken some better photos of these after getting home this weekend, and decided to wear them with baby pink for a change.
Khaki or olive green is really versatile when it comes to pairing up with different colours, brights or pastels work equally well. The straight cut leg and the ribbon on the sides makes them a bit smarter than they would otherwise be in this colour I think. Instead of being a loose safari style, they are a bit sharper so could be smart-sh (with a blouse and jacket maybe), as well as casual. Also the poplin (cotton with a little poly mix) doesn't crease, which is a huge bonus for holidays. They really do hold their shape, both packed into the suitcase and after being worn all day in the heat.
The wide waistband and double button are also a good feature. Practical, comfortable and flattering, especially after a large tapas meal and several cervezas. And ice cream!
And so we're home again and it's time to think of making a few last summer things so that there's time to wear them before the end of the silly season. A whole week away from the studio has given me lots of time for considering my next project and as I'm lucky enough to be going away again soon (in the UK this time) one more summer dress may be on the cards. I'm determined to hang on to that holiday feeling!