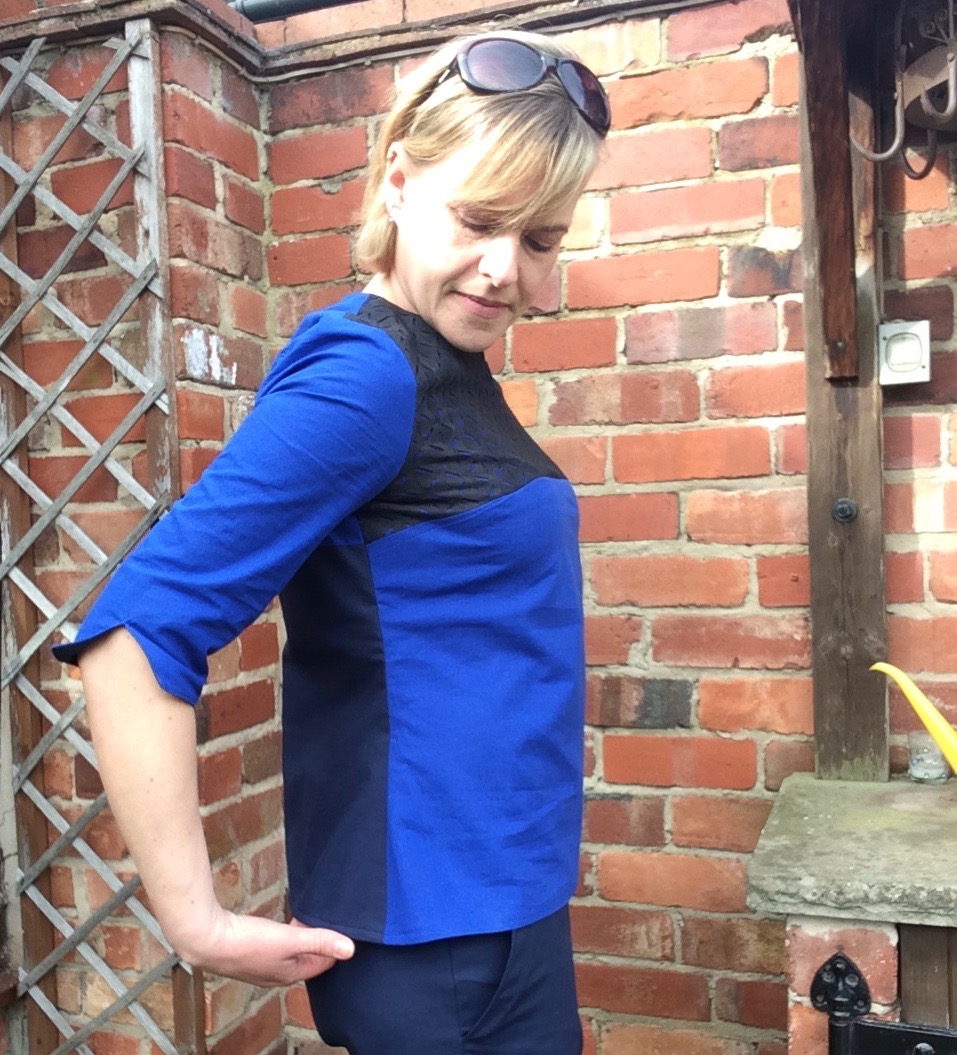
We won't dwell on the weather over the rest of the weekend, suffice to say it was perfect conditions for sewing indoors, with the heating on, a new 'Love Sewing' magazine and mucho vino and chocolate to help things along. And so, thus fuelled, I made this royal blue, black and navy blocked tunic top from the free pattern included in this months LS mag.


The front bodice section and arms are cut from quite a bright royal blue cotton and I've overlaid this colour with black, cut away fabric (t's like black starry shaped lace only with a slightly more weight) so that you can see the contrasting colour through the black cut-outs. I just used the double layer as though it was one piece of fabric through the whole construction process, keeping the raw seam edges aligned and piecing together exactly as the instructions described.

The back yoke is the same royal blue at the top and and a dark navy at the bottom. The pattern called for a concealed zip at the back, but I've chosen to use this black zip and have kept it exposed to bring some black around to the back of the garment, echoing the black lace at the front.

If you're thinking that the trousers and the back of the top look very matchy matchy, you wouldn't be wrong. They're the same fabric. I made these trousers last week and used the last scraps of navy cotton for this back bodice section. I've worn the trousers quite a few times already actually, they've been a good investment make.
I've also used the navy for the sleeve facings inside, which you can just see when they flip up a little. I'm considering finishing the inside sleeve hem more neatly actually (i.e. turning it under) so that the raw edges are fully concealed and I can flip up the sleeve edges if I want to and make little contrasting cuffs. I would certainly consider doing this if I made this top again.
Here are the inside of the sleeves, showing the contrasting facings. You could do these in a bright colour or print to show them off more if you wanted a brighter flash of contrast. I've chosen to top stitch along the cuff edge so that they stay put and won't roll back when I'm taking the top on and off.

I cut a size 12 in this pattern, going by the measurements given on the envelope. I usually cut a size 14 in most of the big commercial patterns and then take in as necessary, but I think this top is pretty spot on in the sizing. Being fitted at the top with two side darts, but then tunic shaped and therefore slightly wider at the bottom, I didn't need to take it in at all. A 14 would definitely have been too generous.

The pattern omits any instructions on how to finish the back neck, so I simply turned the facing over the zip ends and hand stitched them in place. A black hook and eye is keeping things minimal here, in keeping with the rest of the garment, but I could have used a button and loop for the closure instead. A button could easily bring in a contrasting colour and would look cute on a summer floral or print version of this top for example.

So, another wardrobe friendly, easy to wear and practical addition to my hand made wardrobe. It's also dead easy to make so there may be more of these coming along when I feel inclined to stash-bust. Be warned though, there is a VERY busy scarf print currently elbowing its way up the project queue! Studio 63 may not stay in neutrals for much longer. There is nothing more distracting to me than a geometric print and the one I've got in mind is in sunset colours too, perfect for dreaming of warm summer days and holidays to come. Sigh!

In the meantime, look at that blue sky! Taken on Friday afternoon. No filters! Even my beloved pooch, (who will admittedly launch himself happily through the front door with the velocity of a canon ball in even the worst storms and most biting cold) seemed to be particularly relishing the new and improved weather conditions. The smiles say it all.
Hope you had a good Easter and managed to catch a glimpse of blue too.

Hope you had a good Easter and managed to catch a glimpse of blue too.

Nice top! The blue and black works well together and it's a good design for using up small pieces of nice material too. RC
ReplyDeleteThanks RC! I've worn it lots already, it's a good 'un. Sarah x
ReplyDelete