Last year I made some fabulous stand-out pieces that I love to wear (floral trench, winter berry dress, orange lace dress) but frankly they can be scene stealers and show-boaters when asked to spend time with other clothes. Too many of these divas, and they will all start to fight with each other. Wardrobe carnage will ensue.
I chose view B taken from Simplicity K1699, which is a pattern offering a number of different garments including a jacket, trousers and a dress! That's a lot of options for one pattern. As with all 'wardrobe builder' pattern packs I did wonder about how good quality the individual garment patterns were going to be and how it would turn out. I cut a size 14 (UK size) and didn't bother with a toile.
I wanted to make this top in a plain, single colour to emphasise the fitted bodice lines and large peplum flare from the waist. Thinking this dark grey poplin fabric would provide me with some structure and provide an architectural feel to the top. I managed to find a brand new 22 inch, concealed zip straight away in my zip stash, which was perfect. Was this pure luck or is it an indication that my zip stash is now actually larger than the stock in some actual haberdashers? Anyway, using up a zip made me feel better about purchasing the poplin last week. Ok it was less than a fiver, but having been rattling on here about needing to use up stash, it did feel rather naughty bringing another carrier bag of fabric into the studio!
The seam lines on the bodice section offer plenty of opportunity to ensure the fit is good before sewing up. You can see from the photo below where the princess seams are before I pressed them.
The collar is a very satisfying to do; nicely crisp and pointy. The patterns instructions say to simply under stitch the collar to keep the edges from rolling. However I know this top is going to be chucked in the wash fairly regularly and I really want to keep those nice sharp edges. I chose to top stitch all the way around, as near to the edges as possible.
The sleeves are a doddle as they're raglan. Quick and easy.
I fiddled around with the hem a bit trying a few things out, wondering whether to do a plain turned hem or use bias binding, perhaps in a different colour. And what turned up in my trimmings box - a length of bright yellow bias binding! Perfect to emphasise the shape of the wide peplum hem and sharpen up the whole look of the top. It's quite narrow bias, so just adds a small highlight of colour.
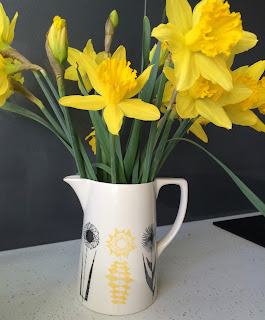
I think my inspiration for these colours comes from my gorgeous Carly Dodsley ceramics, sitting in my grey kitchen and currently filled with bright daffs.
And maybe also inspired from drinking lots of cups of tea from my favourite Jane Foster lion mug! Yellow and grey are a winning combination.
I'm pleasantly surprised at the top, although I haven't made anything else from this set yet. The dress is based on the same bodice pieces with the peplum continuing down to the skirt length you want, so having got this bit fitting properly I imagine the dress might also be a good future project.
You could change the feel of this garment and make this top also in a summery coloured cotton, or floral print for a softer, prettier look if that's what you're after. You could even experiment a bit with colour blocking on the bodice, sleeve sections, collar and peplum. It would actually make quite a fun scrap-buster in contrasting panels.


An unusual combination of design features which I think work well with the plain grey fabric jazzed up with the yellow edging to the peplum. I do like the top stitching on the collar, makes a very crisp finish.
ReplyDeleteHi AWR! Yes I'm glad I went with the yellow. I did think actually if I didn't like it, I could always remove it, but I think it's a stayer! Sarah x
ReplyDelete